Your First Composition
You'll start from an empty workspace, create three notes — a root, a perfect fifth and an octave — play them, and save the result. No music theory needed.
Step 1: Open RMT Compose
Go to rmt.world, or run npm run dev locally and open http://localhost:3000.
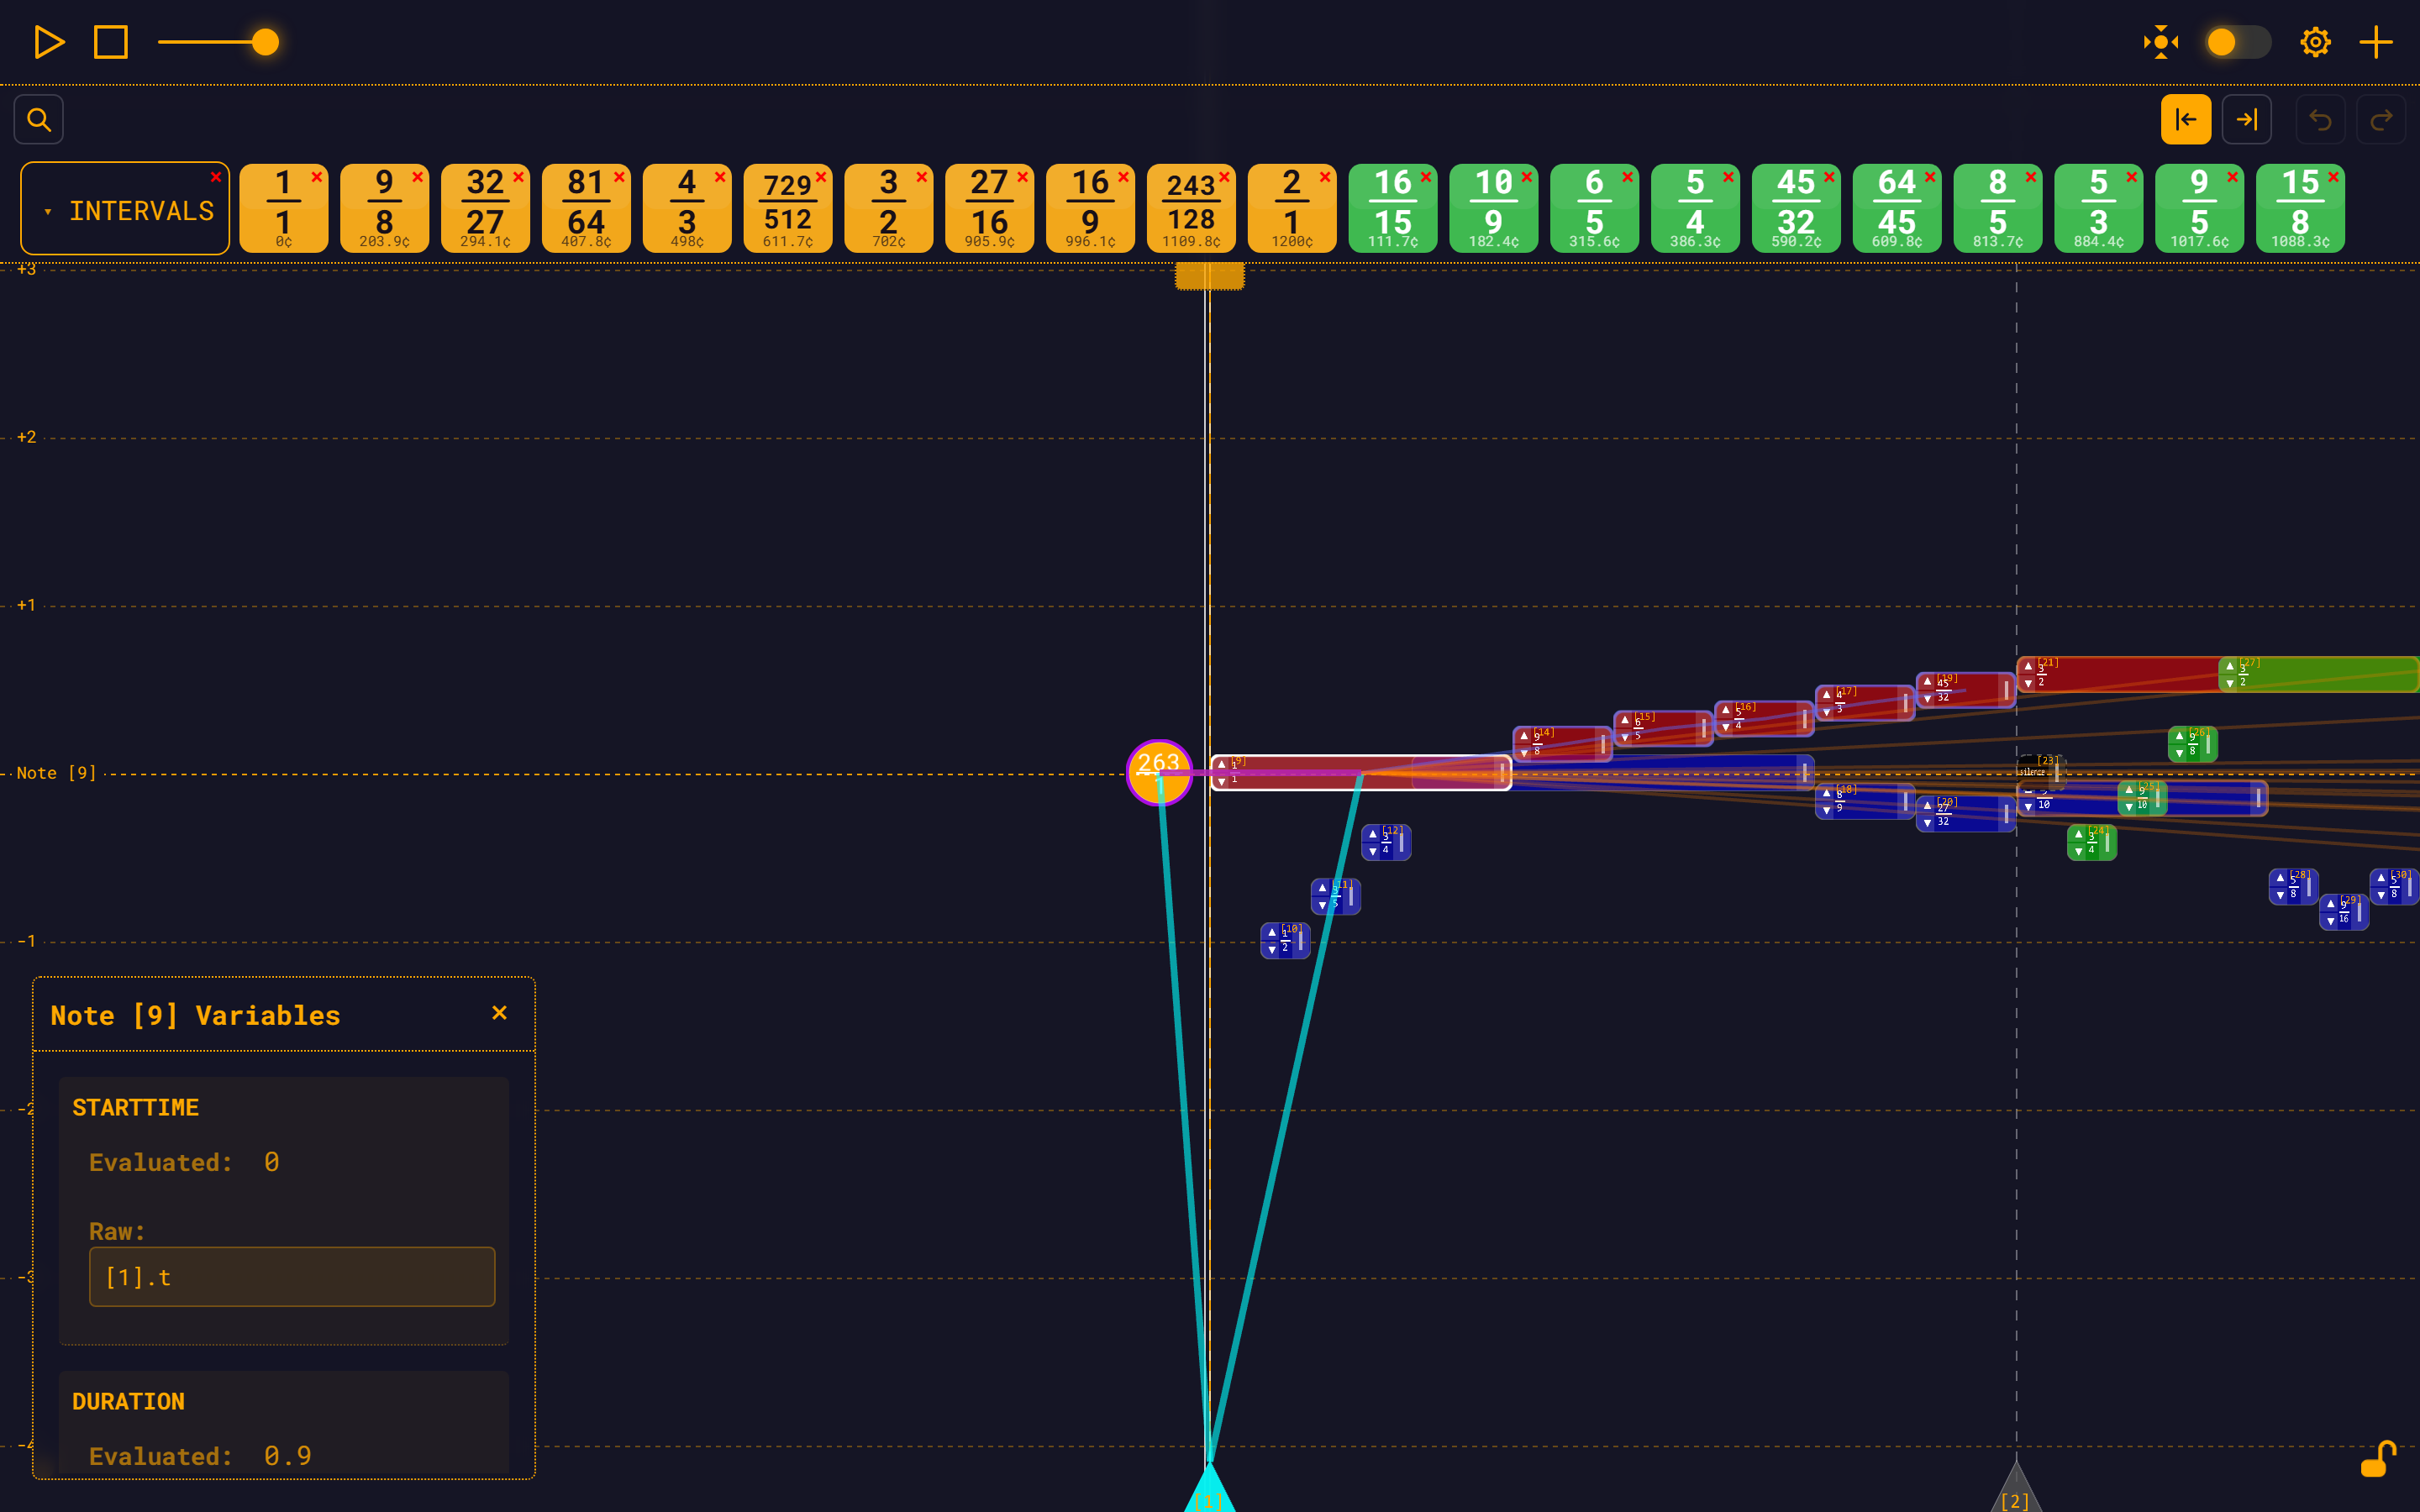
The app boots with the default module already loaded: 169 notes, with the BaseNote at 263 Hz and tempo 100. Play it, drag things around, get a feel for it. Then clear it out.
Step 2: Clear the workspace
- Click the orange circle on the left of the workspace. That's the BaseNote.
- A card appears in the bottom-left titled BaseNote Variables. This is the Note Widget — it shows every variable of whatever you have selected, and it's where you edit them. Drag it by its header if it's in your way; close it with the ×.
- Scroll to the bottom of the widget, to the DELETE ALL NOTES section.
- Click Clean Slate and confirm.
Everything disappears except the BaseNote.
The BaseNote is not a note
The BaseNote (id 0) makes no sound. It is the reference every other note is measured against: it holds the base frequency, startTime, tempo and beatsPerMeasure for the whole module. To hear anything, you have to add notes that reference it.
In the default module those values are 263 Hz, 0, tempo 100, 4 beats per measure.
Step 3: Read the workspace
| What you see | What it is |
|---|---|
| Vertical axis (Y) | Frequency. Higher on screen = higher pitch. |
| Horizontal axis (X) | Time. Further right = later. |
| Coloured rectangles | Playable notes. |
| Orange circle | The BaseNote. |
| Dotted horizontal lines | Octave guides, relative to the selected note (or the BaseNote if nothing is selected). |
| Triangles along the bottom | Measure bars. |
| Dark rectangles with a dashed border | Silences — notes with a start time and a duration but no frequency. |
Step 4: Create the root note
With the BaseNote still selected, scroll the note widget to the section headed ADD NOTE / SILENCE.

You'll see:
- a Note / Silence pair of radio buttons — leave it on Note
- three expression fields, each already filled in for you, each showing a live Evaluated: value above the Raw: box you type into
For a note created from the BaseNote, the defaults are:
| Field | Expression | Meaning |
|---|---|---|
| Frequency | base.f | the BaseNote's frequency — 263 Hz |
| Duration | beat(base) | one beat, at the BaseNote's tempo |
| Start Time | base.t | the BaseNote's start time — 0 |
Leave all three alone and click Create.
A note appears. It plays at the base frequency, for one beat, starting at time zero.
There is no "At Start / At End" here
Those options appear only when you create a note from another note — they say where the new note attaches. The BaseNote is the origin, so there is nothing to attach to, and the button just reads Create. On any other note it reads Create Note.
Step 5: Create the fifth
- Click your new note in the workspace. The widget retitles to Note [1] Variables.
- Scroll to ADD NOTE / SILENCE again. This time there is an extra pair of radios: At Start / At End. At End is already selected — that's what you want, so the new note plays after this one.
- Look at the Frequency field. It is prefilled with
[1].f— the parent's frequency, not the base's. New notes inherit the pitch of the note you created them from, which is why they start out at the same height. Replace it with:
base.f * (3/2)- Click Create Note.
The second note lands a perfect fifth above the first, starting exactly where the first one ends — because its Start Time was prefilled as [1].t + [1].d, "note 1's start plus note 1's duration". That reference is a dependency: move note 1 and note 2 follows it.
Legacy JavaScript syntax
module.baseNote.getVariable('frequency').mul(new Fraction(3, 2))Step 6: Create the octave
- Select note 2.
- In ADD NOTE / SILENCE, leave At End selected.
- Replace the Frequency field with:
base.f * 2- Click Create Note.
Three notes: 1/1, 3/2, 2/1. Root, fifth, octave.
Step 7: Play it
Click Play (▶) in the top bar. The playhead sweeps across and you hear the three notes in sequence.
Loop it
Shift-click Play, or press and hold it for half a second, to arm loop playback. The play icon's three bars shrink into dashes and orbit a figure-8 while looping. Shift-click or long-press again to leave loop mode — the current pass finishes, then playback stops.
Transport Controls covers stop, pause and the playhead.
Step 8: Change things
Edit an existing expression
Select a note. In the widget, each variable has a Raw: box. Type a new expression and click Save — the Save button only appears once you've typed something.
Changes apply on save, not while you type
And if an expression doesn't compile, the reason appears in red under the Save button and the box gets a red border. The note doesn't change until the expression is fixed.
More in Editing Notes.
Transpose the whole piece
Click the BaseNote, change its frequency from 263 to 330, and Save. Every note moves with it. The intervals are untouched, because they were never absolute numbers in the first place — that is the whole point of the tool.
Nudge one note up or down
The frequency row of a selected note has ▲ and ▼ buttons. By default they multiply the frequency by 2 and by 1/2 — an octave up and down. That interval is configurable: open Settings (the gear in the top bar) → Arrows and set the up interval to anything from 1/16 to 16. Set it to 3/2 and the arrows transpose by fifths. See Transposing with Arrows.
Change a duration
The duration row has five note-length buttons — Whole, Half, Quarter, Eighth, Sixteenth — plus two dot buttons: . multiplies by 3/2, .. by 7/4. Quarter is one beat, so it writes beat(base); a dotted eighth writes beat(base) * (3/4).
Try other intervals
| Interval | Ratio | Expression |
|---|---|---|
| Major third | 5/4 | base.f * (5/4) |
| Minor third | 6/5 | base.f * (6/5) |
| Perfect fourth | 4/3 | base.f * (4/3) |
| Harmonic seventh | 7/4 | base.f * (7/4) |
| 12-TET semitone | 2^(1/12) | base.f * 2^(1/12) |
A 12-TET semitone is irrational, so that last note displays with a leading ≈ and is hatched on the canvas. That is expected — see the ≈ symbol.
Undo
Three ways, all equivalent: the keyboard — Ctrl/Cmd + Z to undo, Ctrl/Cmd + Y or Ctrl/Cmd + Shift + Z to redo — the Undo / Redo entries in the + menu, or the Undo/Redo buttons at the right of the module bar's toolbar.
Step 9: Select several notes at once
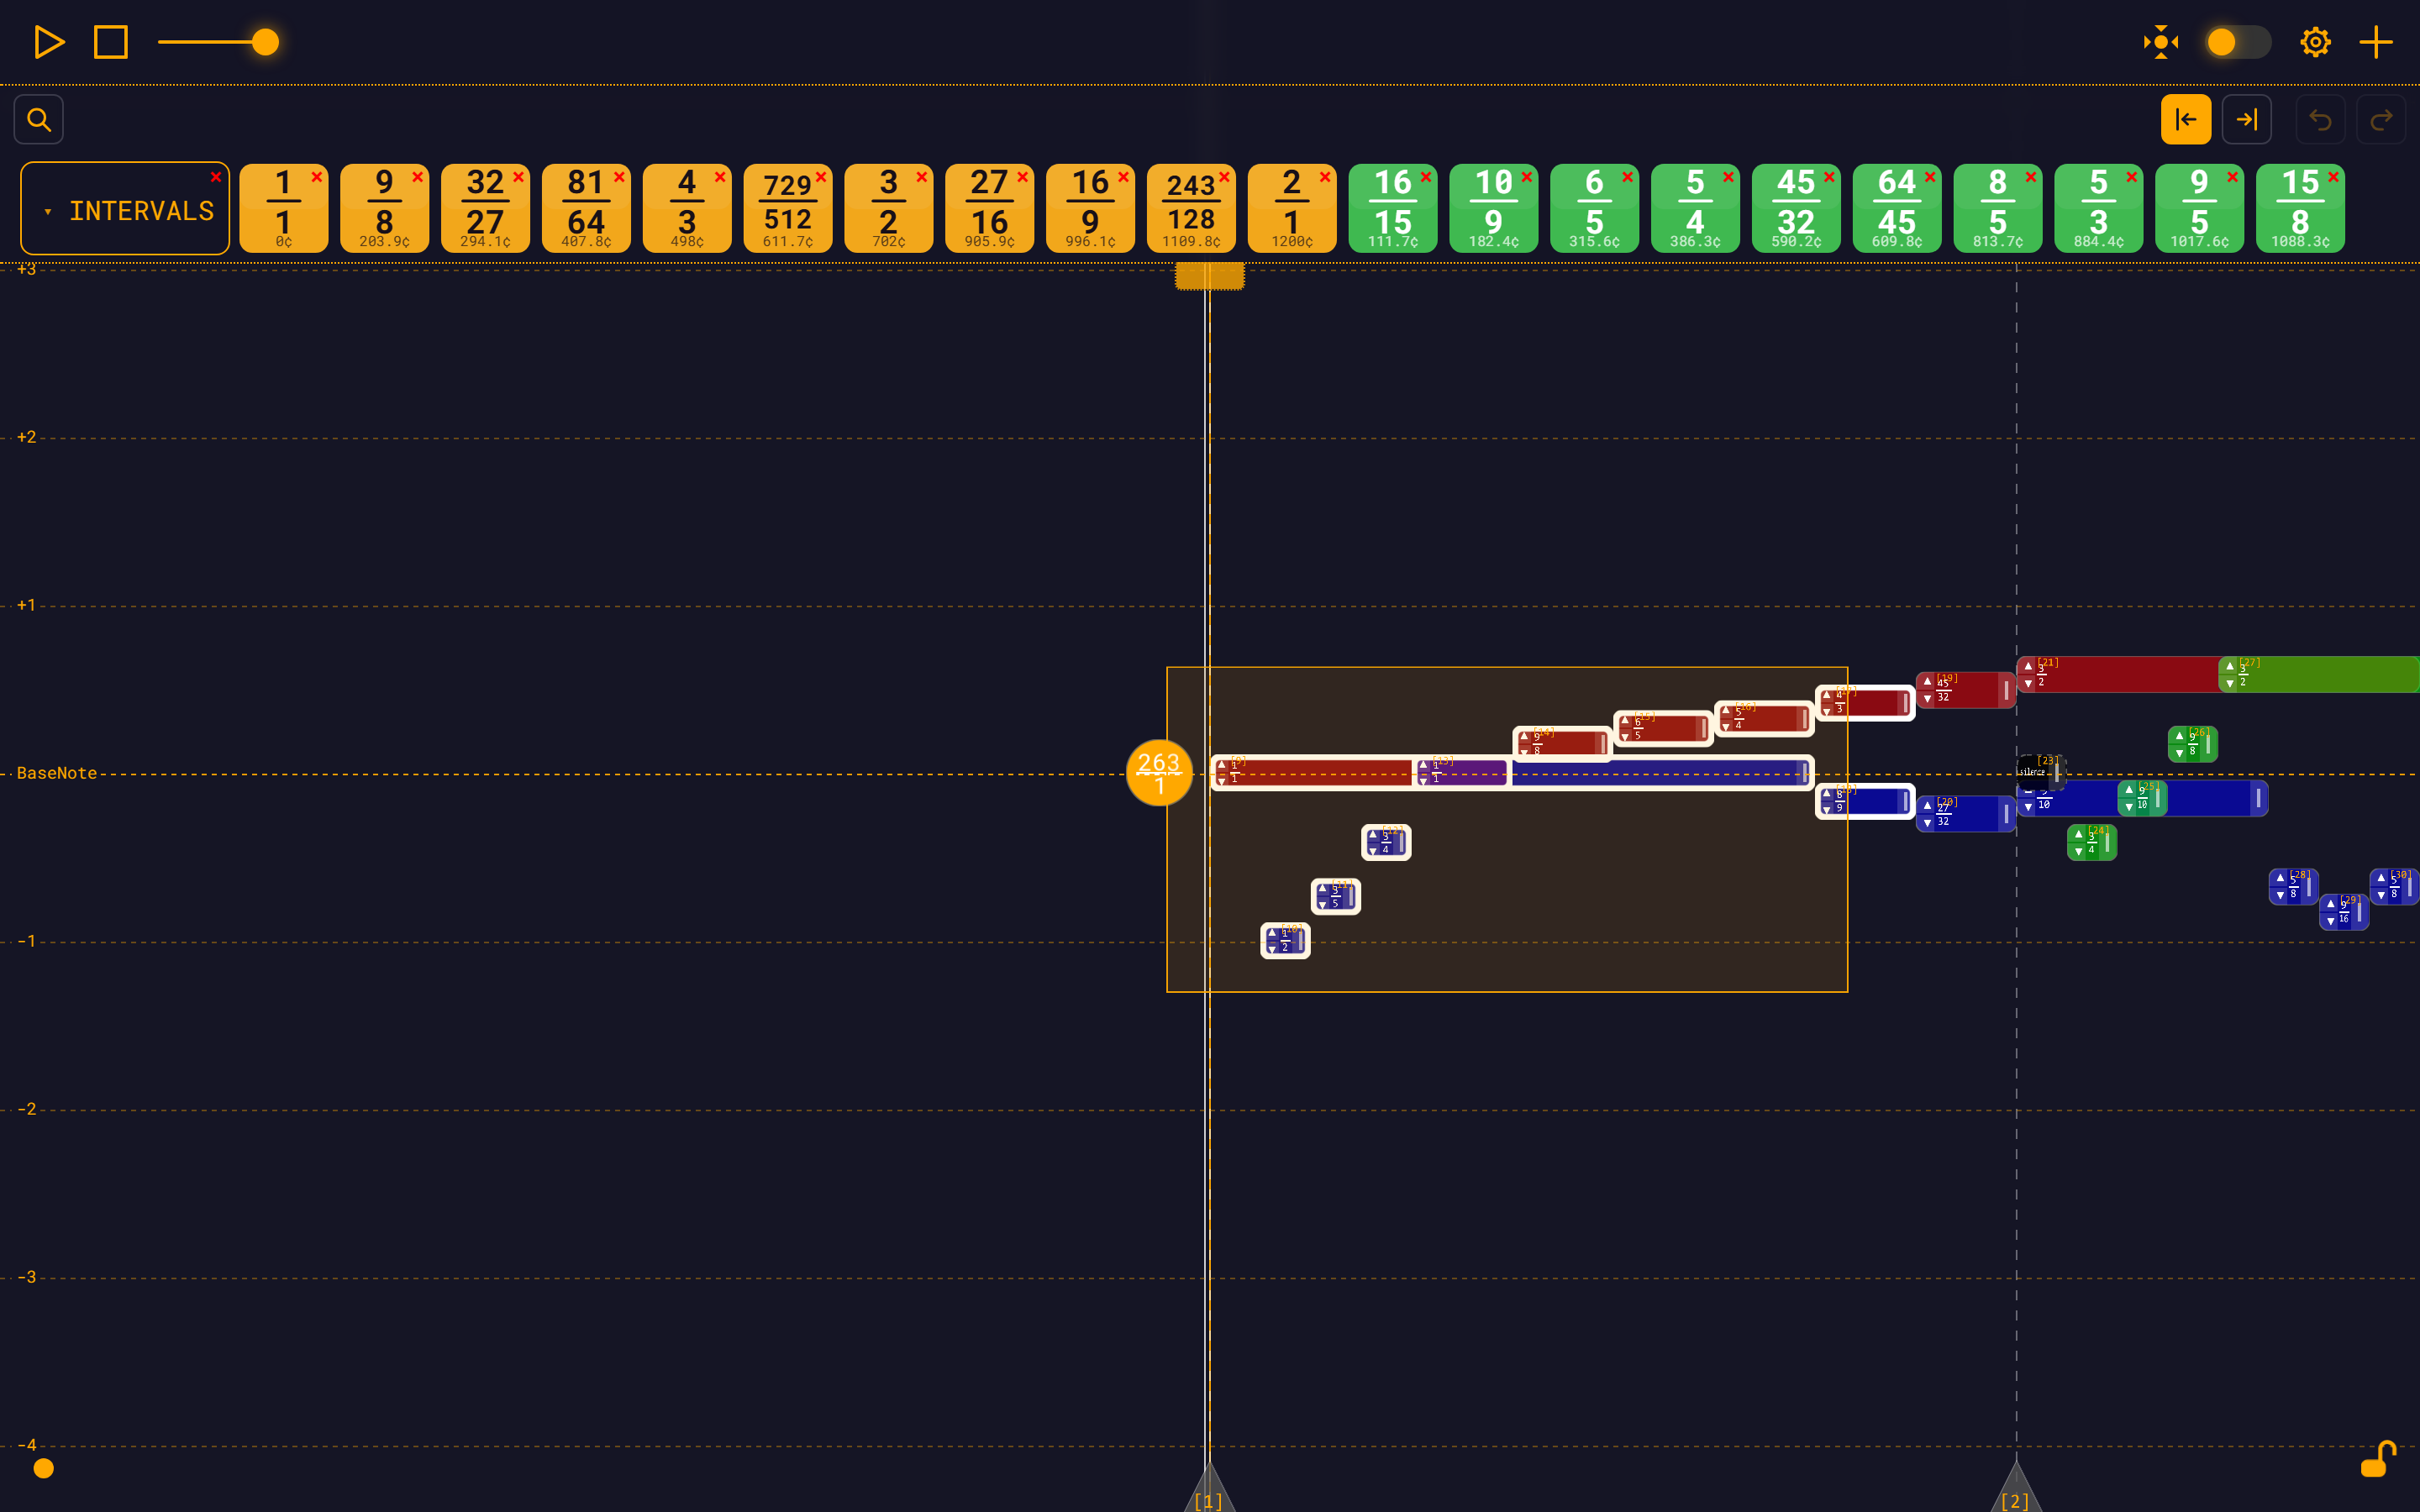
- Shift + drag on empty background rubber-bands a marquee over the notes inside it.
- Shift + click a note toggles it in or out of the selection.
- On a touchscreen, a long-press does the job of Shift: hold on empty space to marquee, hold on a note to toggle it.
With more than one note selected, a group widget appears. It offers Copy to Modules — which saves the selection into the module library's Custom section, rooted at its earliest note and with its dependency tree intact — and Delete all. Dragging any note in the group drags the whole group.
Selection & Group Editing has the rest.
Step 10: Save your work
- Click the + button at the far right of the top bar. Its two bars rotate flat into a red – and the main menu drops down.
- Click Save Module.
- A file called
module.jsondownloads. Every save uses that same name, so rename the file if you plan to keep more than one — see Saving Modules.
To bring it back later: + → Load Module ▾ → Load Module from file…
The same submenu holds Reset Default Module, which restores the composition the app boots with. It's undoable.
What you've learned
- The BaseNote is the reference; it makes no sound.
- Every note property is an expression —
base.f * (3/2),beat(base),[1].t + [1].d. - New notes are created from the ADD NOTE / SILENCE section of the note widget, and inherit the pitch of the note you create them from.
- Referencing another note creates a dependency: change the parent, the child follows.
- Ratios like 3/2 and 5/4 are stored exactly, so transposing is a single edit.
Next steps
- Core Concepts — the theory under all of this
- Build a Major Scale — the next tutorial
- User Guide — every feature, in detail