Audio & Reverb
What comes out of the speakers is more than the notes. Every voice runs through a shared reverb, an optional stereo placement stage, the master volume, and a limiter. All of it is controlled from one place.
Out of the box
| Default | |
|---|---|
| Master volume | 100% |
| Reverb | On — a medium room, mixed in at 25% |
| Stereo width | Off — no pitch-based placement; every note comes out of the centre |
| Limiter | On |
So a fresh module already has a little room around it. If you want the raw, dry sound, turn reverb off.
Where the controls are
Click the gear in the top bar and choose the Audio tab. The panel is not modal — leave it open and keep composing; every change applies immediately, during playback.
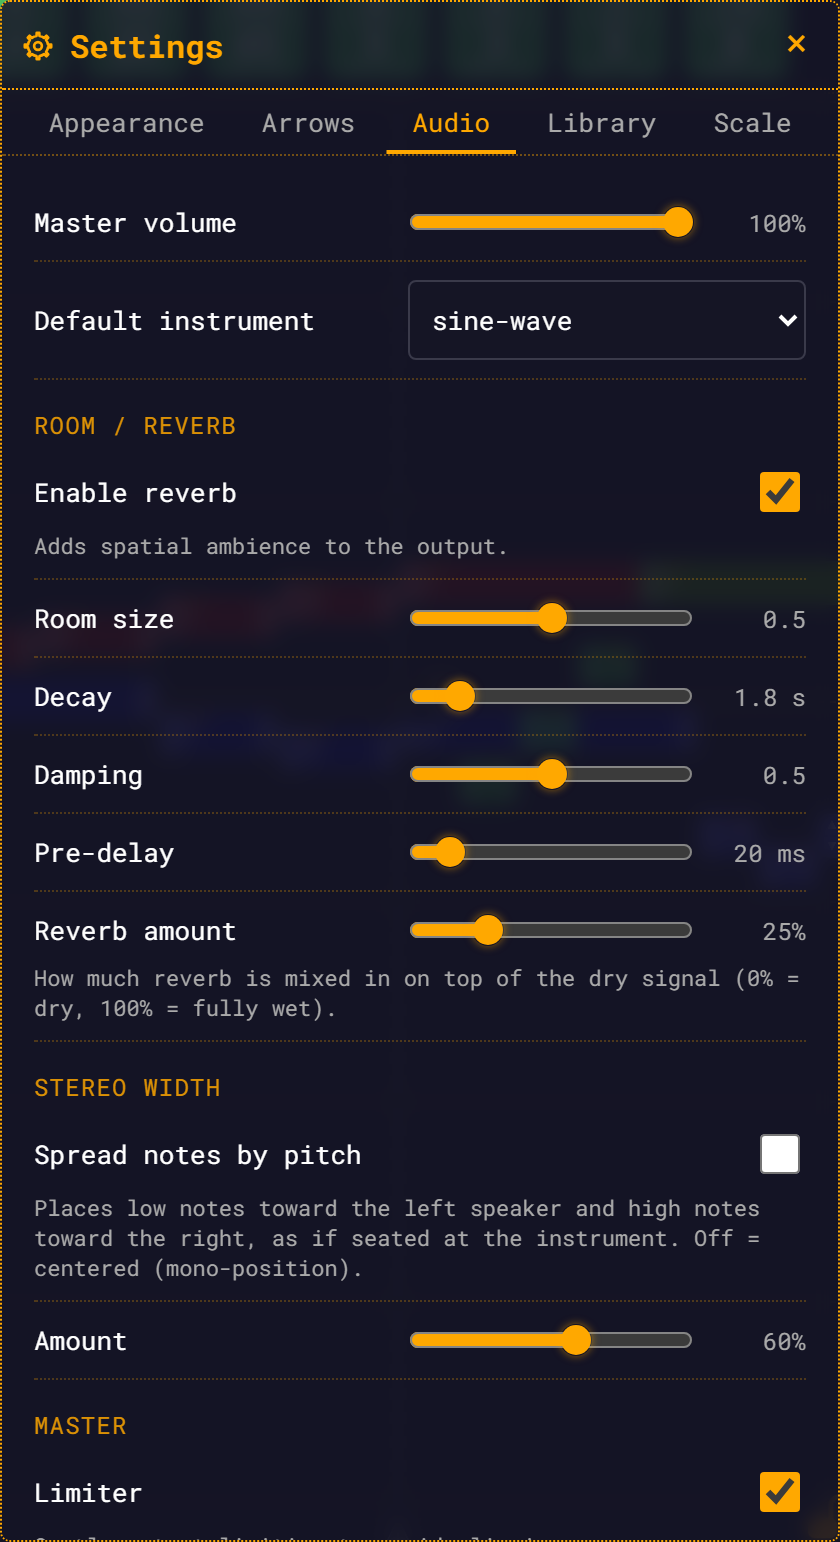
| Control | Range | Default | What it does |
|---|---|---|---|
| Master volume | 0–100% | 100% | The same value as the transport slider |
| Default instrument | the nine names | sine-wave | What a note plays when nothing in its frequency chain pins an instrument — see Instruments |
| Enable reverb | on/off | on | Adds spatial ambience to the output |
| Room size | 0–1 | 0.5 | How big the space sounds |
| Decay | 0.1–12 s | 1.8 s | How long the tail rings |
| Damping | 0–1 | 0.5 | How fast the highs die away in the tail |
| Pre-delay | 0–200 ms | 20 ms | The gap between the note and the start of its reverb |
| Reverb amount | 0–100% | 25% | How much reverb is mixed in on top of the dry signal |
| Spread notes by pitch | on/off | off | Stereo placement by pitch |
| Amount | 0–100% | 60% | How far that placement spreads |
| Limiter | on/off | on | Gentle output limiting to avoid clipping |
Reverb
The reverb is a send, not a wet/dry crossfade. The dry signal is always there at full level; Reverb amount decides how much wet is added on top. At 0% you hear the module dry; at 100% you hear it dry plus a very wet reverb, not a reverb-only signal.
The room itself is generated in the browser at runtime — no impulse-response files are downloaded.
The two kinds of control
Room size, Decay and Damping rebuild the room. Changing one of them re-renders the reverb, which happens a quarter-second after you let go of the slider — so dragging renders once at the end of the drag, not on every pixel. The new room swaps in when it's ready.
Enable reverb, Pre-delay and Reverb amount are instant. They change a level or a delay, and the change is smoothed, so you can toggle reverb on and off mid-playback without a click. Notes already ringing keep their tails.
Using it
- Room size is the early-reflection cue — the sense of how far the walls are. Small values feel like a booth, large ones like a hall.
- Decay is the length of the tail. Short (under a second) keeps a fast piece legible; long (several seconds) turns sustained notes into a wash.
- Damping rolls the highs off the tail faster than the lows, the way real surfaces absorb sound. High damping = a soft, dark room; low damping = a bright, tiled one.
- Pre-delay buys clarity. A few tens of milliseconds keeps the attack of a note in front of its own reverb.
A sustained tone's reverb tail shimmers
Hold a long steady note with a lot of reverb and the tail will waver a little rather than decaying perfectly smoothly. That is inherent to convolution reverb with a narrowband input — recorded impulse responses do it too, and no amount of tuning removes it. If it bothers you, the levers are Decay (shorter) and Reverb amount (less).
Stereo width
Off by default: every note comes out of the centre. (The reverb is still a stereo effect — its impulse response is decorrelated left and right — so a dry-centred module with reverb on is not a mono signal.)
Turn Spread notes by pitch on and each note is placed left-to-right according to its pitch, as if you were sitting at a keyboard — low notes to the left, high notes to the right. The BaseNote is dead centre. Three octaves above it is hard right, three below is hard left, and Amount scales how far the whole spread reaches.
It is a musical effect, not a mixing tool: it makes a dense module easier to hear apart, and it makes a wide-ranging melody sweep across the stereo field.
TIP
Toggling stereo mid-playback takes a couple of seconds to bite. The placement is baked into each note as it is scheduled, and the scheduler runs about 2 seconds ahead — so already-scheduled notes keep their old placement. Notes already sounding never move.
Both sampled instruments are mono recordings. Their stereo position comes entirely from this stage.
Limiter
A peak catcher on the master output. It sits after the master volume, last in the chain before your speakers, and stops loud passages from clipping — a −6 dB threshold with a high ratio, a fast attack and a quarter-second release.
Leave it on. It is not a volume control and it is not a compressor for tone-shaping; it is there so a dense chord in a module you have never heard before does not distort. Turn it off only if you are measuring the raw output.
Master volume
Two knobs, one value: the top-bar slider and Settings → Audio → Master volume are the same thing. Drag either and the other follows. The level is saved and restored on your next visit.
The signal path
each note → its instrument's bus ─┬─ dry ──────────────────────────┐
                                  └─ reverb send → the room → wet ─┤
                                                                   ▼
master volume → limiter → speakersEvery instrument gets its own bus, but the buses are plumbing, not a mixer: there are no per-instrument volume, mute, solo or send controls. The only levels you can change are master volume and reverb amount.
Where these settings live
Audio settings are stored in your browser, not in the module. Share a module file and the person opening it hears it through their reverb settings, not yours.
They are also outside Undo — Ctrl/Cmd + Z covers the module, not the settings panel. To get back to the defaults, use Reset this tab (audio only) or Reset all (every tab) at the end of the panel. Both ask for confirmation before they run, and neither can be undone.
See also
- Instruments — the nine voices these controls are downstream of
- Transport Controls — the other master-volume knob, and how playback is scheduled
- Settings Reference — every setting, range and default in one table